Tuesday, 24 December 2013

Free food
The first in an occasional series on ideas for eating ‘for free’, as they now say:

Just Wild About Woodlice
From a 1885 book Why not eat insects? By Vincent M Holt

‘Woodlice sauce is equal, if not distinctly superior to shrimp’ wrote the Victorian Naturalist Vincent M Holt. ‘Put into a saucepan a quarter of a pound of fresh butter, a teaspoonful of flour, a small glass of water, a little milk, some pepper and salt.  Place it on the stove, heat and stir.  As soon as the sauce is thick, take it off and put in the (boiled) wood-lice. This is an excellent sauce for fish.’

Tuesday, 12 November 2013

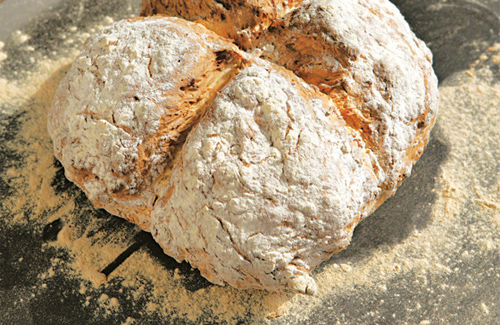
A young friend came to stay for the weekend and made us some soda bread one morning! yum yum!  So will find a recipe on here to try one day when we run out of bread - and actually have an oven, which we don't at present.
Soda bread
Here's one recipe from the ever helpful BBC (http://www.bbc.co.uk/food/recipes/irishsodabread_67445):

Ingredients

Preparation method

  1. Preheat the oven to 400F/200C/Gas 6.
  2. Tip the flours, salt and bicarbonate of soda into a large mixing bowl and stir.
  3. Make a well in the centre and pour in the buttermilk, mixing quickly with a large fork to form a soft dough. (Depending upon the absorbency of the flour, you may need to add a little milk if the dough seems too stiff but it should not be too wet or sticky.)
  4. Turn onto a lightly floured surface and knead briefly.
  5. Form into a round and flatten the dough slightly before placing on a lightly floured baking sheet.
  6. Cut a cross on the top and bake for about 30 minutes or until the loaf sounds hollow when tapped. Cool on a wire rack.


...and while I'm at it, here's a good recipe for scones, for those days when there's no bread in the house:

Ingredients

  • 225g/8oz self raising flour
  • pinch of salt
  • 55g/2oz butter
  • 25g/1oz caster sugar
  • 150ml/5fl oz milk
  • 1 free-range egg, beaten, to glaze (alternatively use a little milk)

Preparation method

  1. Heat the oven to 220C/425F/Gas 7. Lightly grease a baking sheet.
  2. Mix together the flour and salt and rub in the butter.
  3. Stir in the sugar and then the milk to get a soft dough.
  4. Turn on to a floured work surface and knead very lightly. Pat out to a round 2cm/¾in thick. Use a 5cm/2in cutter to stamp out rounds and place on a baking sheet. Lightly knead together the rest of the dough and stamp out more scones to use it all up.
  5. Brush the tops of the scones with the beaten egg. Bake for 12-15 minutes until well risen and golden.
  6. Cool on a wire rack and serve with butter and good jam and maybe some clotted cream

Thursday, 7 November 2013

Tea Bread

ha ha!
Now that we're definitely moving I'm sorting out cupboards, especially in the kitchen.  I've come across the bottom of lots of packets of shreddies, shredded wheat and all bran, the bits which no-one wants to eat. 

No-one seems to like to eat the bits at the bottom of the packets, probably because, although they're perfectly alright, they tend to go soggy when the milk's added.  So am going make a fruit loaf with them.


Here's my take on the classic All-Bran tea bread recipe:

5oz cereal (mine was mixture of shredded wheat, shreddies and all bran)
5oz raisins or sultanans
10 fl oz tea, milk or orange juice
2 oz sugar
6 oz SR flour
2 eggs
  1. Soak cereal in tea/milk/juice for a couple of hours.  
  2. Add dried fruit, sugar and eggs.  Stir in flour.
  3. Cook about an hour at about 190C.
  4. Eat: sliced, and spread with lots of butter.

Monday, 28 October 2013

stuffed peppers

Autumn is when peppers are at their best, and we have lots of tomatoes, courgettes and apples from the garden, so here are a few ideas.

Stuffed Peppers
from: http://www.bbc.co.uk/food/recipes/stuffedpeppers_82902

4 red peppers
4+ tbsp olive oil 
5 oz peas
1 large red onion, finely chopped
2 cloves garlic
5 oz breadcrumbe
1 egg
s&p

  1. Preheat oven to 180/350/4
  2. Cut around stalk and remove tops of peppers.  Remove any seeds.
  3. Heat oil and saute peas, onion and garlic.
  4. Soak bread in water for a few minutes.
  5. Add breadcrumbs and egg to pea mixture.
  6. Stuff the empty peppers with mixture and replace their tops.
  7. Place on baking tray and season and drizzle with oil.
  8. Cook about 20 - 30 minutes until soft and cooked through.
The downsides of this recipe were: the mixture was rather crumbly and there was too much pepper to eat.  
My variation of this would be to add another egg to the mixture and use fewer breadcrumbs.  Then cut the peppers lengthwise, lay on a dish, heap on the mixture and possibly cook with a little grated cheese on top.

And some other ideas:

http://www.goodtoknow.co.uk/recipes/526229/baked-stuffed-peppers

http://sortedfood.com/#!/stuffedpeppers/

http://www.bbcgoodfood.com/recipes/4404/easy-stuffed-peppers

Friday, 4 October 2013

Far from a nuisance, fallen autumn leaves should be treasured as a future soil improver.  Make the most of this seasonal dividend

Dealing with fallen leaves is synonymous with autumn.  Most gardeners who are lucky enough to have deciduous trees will be well versed with in the practice of collecting them, although many may not make the most of this valuable resource.
Leaf litter is a source of free organic matter - and should be used to replenish the garden - either left where they lie, where appropriate, or collected and made into leaf-mould.
If we take our cue from nature and look to deciduous forests, leaf litter there provides a blanket that enriches soil as it breaks down.  The eventual result is crumbly dark humus.

Leave (haha!) or remove?
In a garden, the needs of other plants and fauna must be considered when deciding whether to collect or leave in situ.  Fallen leaves will provide a habitat for overwintering animals - such as hedgehogs - but also for slugs; and if leaves are left on lawns they may kill the sward beneath.
Mediterranean plants such as lavenders do not appreciate the humidity leaf litter provides, and it can lead to fungal problems.
When it comes to making leaf-mould, all leaves are not equal.  Oak, beech and hornbeam work best.  Thicker leaves such as plane and horse chestnut take longer to decay, so shred first.  Evergreen laurels and holly do not make good leaf-mould.  And lastly, pine needles, though slow to rot, once decayed are an ideal mulch for acid loving-plants.

Leaves best collected
  • Leaves that have fallen onto evergreens such as conifers, evergreen azealeas and silver-leaved plants should be removed promptly before they cause foliage underneath to decay.
  • Those that fallin to plants which suffer from winter wet, such as yuccas.
  • Those on gravel gardens, paths, drives  and drains.
  • Those on lawns (and in/on ornamental grasses).
  • Ponds and water features will rapidly become clogged if leaves are not removed.
Tools for the job
  • Rakes: on a lawn this can be a light plastic or a metal spring-tine rake.  Thin spring-tine rakes are great for getting in between plants in beds.
  • Leaf blowers now come in various guises, they can even be connected to a solar-powered battery which are lightweight and quieter, in addition to the environmental benefit.
  • Use two flat boards held in either hand to scoop up large piles of leaves.  Leaf vacuums can be used to suck up piles of leaves.
  • On a larger scale, a mower can be used to collect leaves with the added benefit of shredding at the same time, which speeds up the decomposition process.
Using fallen leaves
Once gathered, leaves can be added to the compost heap to counterbalance a mass of green material such as grass-clippings, or kept separate and converted into precious leaf-mould.
Leaf-mould is a great soil improver, either mixed in or as a surface mulch.  It will help break down heavy clay; aid sandy soils to retain moisture; and increase worm and micro-organism activity in both situations.  The natural place to apply leaf-mould is around trees, shrubs and woodland bulbs.  It is also useful in aiding drainage in potting-compost mixes.

Making leaf-mould
Depending on the scale and space available, the easiest way to make leaf-mould is to collect leaves into a bin bag, loosely tie the top and then pierce holes in the sides.  The leaves need to be moist, so add a little water if necessary.  These can then be stacked out of the way for 12 - 18 months, in which time the leaves will break down.  On a larger scale, a cage can be created using chicken wire and the leaves placed in this.  Shredded leaves will break down more quickly, so it can be worth going over piles with a mower first.

When to leave in place
An alternative to removing leaves from areas of rougher grass is to use a mower without a collection hood to finely chop up the leaves directly back into the grass.  Similarly, in orchards it is fine for fallen leaves to rot down into the grass during winter.
In woodland plantings, shade beds or at the backs of borders, the easiest method is to let any fallen leaves decompose directly onto the bed (after all, we're not looking for work!).

From the that invaluable mine of information, the Royal Horticultural Society (http://www.rhs.org.uk/).
Royal Horticultural SocietyThe Royal Horticultural Society is the UK's leading gardening charity dedicated to advancing horticulture and promoting good gardening.  Our goal is to help people share a passion for plants, to encourage excellence in horticulture and inspire all those with an interest in gardening.


Another use for leaf mould:  to 'lighten' for soils such as John Innes No 3, loam-based compost which is recommended for permanently container-grown shrubs, perennials and lilies which, without some sort of organic addition can become rock-like.  When two years old or more, leaf mould can be sieved and used, 50/50 with sand, to make fine potting compost for seeds and cuttings.

Saturday, 24 August 2013

Now that we've had a few weeks of excellent sunny weather and have been eating lots of salads, perhaps it's time to try some different salad ideas ...

Some dos and don't 

  • Wash all lettuces and herbs in a sink full of cold water to remove dirt and grit.
  • Invest in a salad spinner to dry lettuce instantly.
  • Buy your ingredients in season.
  • Experiment with different oils such as pumpkin, hazelnut or walnut.
  • Add cheese, nuts, croutons or crumbled prosciutto.
  • Grow your own baby lettuces from seed in pots.
  • Use an old jam jar to mix your salad dressing - no whisks are needed.
  • Chew on a piece of flat-leaf parsley after eating garlicky salads to remedy bad breath.
  • Refrigerate lettuce wrapped in damp paper towelling and plastic bags to keep it fresh.
  • Try making Thai salads with lime/fish sauce dressing.
  • Choose the right lettuce. Most fall into three groups: spicy (watercress), bitter (radicchio) and mild (red oak leaf).
  • Never buy tired-looking lettuce with brown spots.
  • Don't mix too many flavours.  Stick to one theme (eg, Thai, Mediterranean)
  • Avoid cheap acidic vinegars and bland blended oils.
  • Don't buy mayonnaise or aioli dressing.  Make your own instead.
  • Don't stop with lettuce.  Tomatoes, chickpeas, couscous and fruit are all excellent in salads.
  • Don't add onions until just before serving or the flavour will overwhelm the other ingredients.
  • Don't limit your self to supermarkets - farmers' markets have interesting lettuces, such as mesclun and mizuna.
  • Don't dress your salad until just before serving or it will go soggy.
  • Don't refrigerate tomatoes because it changes their texture.
  • Don't assume a salad must be served cold - make warm dressings as well.
  • Don't skimp - pay that little bit extra for buffalo mozzarella.


Many years ago, when I used to be a landlady for university students, one student said 'the worse your food looks, the better it tastes'! Backhanded compliment or what?!